How to Create Viral AI Epoxy Resin Table Making Videos (Complete Guide + Master Prompt)
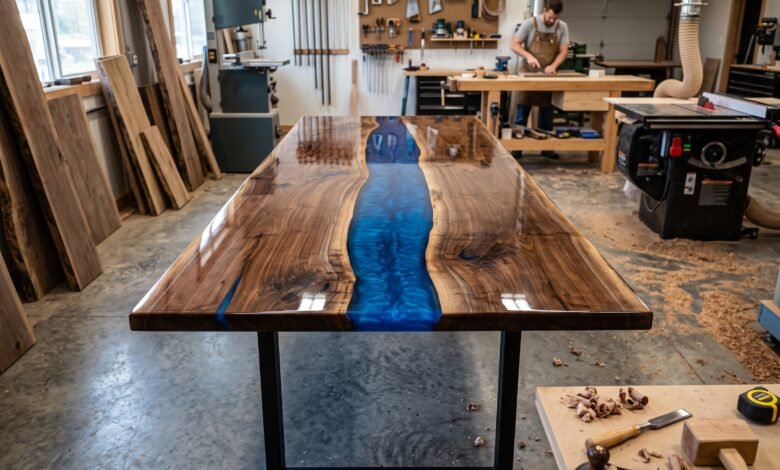
How to Create Viral AI Epoxy Resin Table Making Videos (Step-by-Step Guide)
AI-generated woodworking videos have become one of the most satisfying content categories on TikTok, Facebook Reels, Instagram Reels, and YouTube Shorts. Epoxy resin table transformation videos, in particular, attract millions of views because viewers enjoy watching raw materials become luxury furniture through realistic AI-generated scenes.
In this guide, you’ll learn a complete workflow for creating cinematic epoxy resin table making videos using AI tools. From generating unique table ideas to producing realistic images, smooth animations, and a polished final edit, this tutorial covers the entire process from start to finish.
Tools You’ll Need
- ChatGPT or Claude AI (Prompt Generation)
- Google Flow or NanoBanana (Image Generation)
- Google Veo or Seedance (Image-to-Video)
- CapCut (Final Video Editing)
Step 1 – Generate Your Master Prompts
Begin by copying the complete master prompt and pasting it into ChatGPT or Claude AI.



The AI will guide you through a series of questions to customize your project. You’ll choose the craftsman, workshop style, table shape, epoxy resin design, and the final room where the completed table will be showcased.
After answering every question, the AI automatically generates everything required for production, including seven detailed image prompts and seven matching video animation prompts.
At the end of this step, you’ll have:
- 7 AI image prompts
- 7 AI video animation prompts
- A complete workflow ready for production
Step 2 – Generate Your AI Images
Open Google Flow or NanoBanana and begin creating your images one by one.
Generate the first image using the first prompt. Once it’s finished, download the image and use it as a reference when generating the second image. Repeat this process throughout the entire sequence so every image maintains consistent composition, lighting, and table design.
The seven images typically represent the complete woodworking process, beginning with the empty mold and ending with the finished luxury epoxy resin table displayed inside a beautifully designed room.
For easier organization, save each file using a simple naming system such as:
- image01.jpg
- image02.jpg
- image03.jpg
- image04.jpg
- image05.jpg
- image06.jpg
- image07.jpg
Step 3 – Turn the Images into AI Videos
Once every image has been generated, switch to Google Veo or Seedance Image-to-Video mode.
Upload the first image as the starting frame and the second image as the ending frame. Then paste the corresponding video prompt generated by ChatGPT or Claude AI.
Repeat this workflow for each remaining pair of images until all clips have been generated. The final clip should showcase the completed epoxy resin table with smooth cinematic camera movement and premium lighting.
Download every video clip before moving on to the editing stage.
Step 4 – Edit Your Video in CapCut
After generating all seven AI video clips, open CapCut and create a new project using a vertical 9:16 canvas. Import every clip into the timeline in the correct order to create a smooth and satisfying transformation sequence.
To capture viewers’ attention immediately, place the final reveal clip at the beginning of your video for about two seconds. This creates a powerful visual hook before showing the complete table-building process.
Arrange your timeline in this order:
- Final Reveal (First 2 Seconds)
- Preparing the Empty Mold
- Arranging Decorative Materials
- Pouring the Epoxy Resin
- Resin Curing Process
- Removing the Mold Frame
- Polishing the Table Surface
- Final Luxury Showcase
This editing style creates curiosity while keeping viewers engaged until the final reveal.
Step 5 – Add Music and Final Effects
To make your video more satisfying, add soft ASMR-style background music with subtle woodworking sounds. Avoid loud or distracting music, as the focus should remain on the resin pouring, polishing, and finishing process.
You can also add gentle sound effects such as sanding, resin pouring, polishing, or workshop ambience to create a more immersive viewing experience.
Keep transitions simple by using Fade or Cross Dissolve with a short duration so every scene flows naturally into the next.
Recommended Export Settings
- Aspect Ratio: 9:16 Vertical
- Resolution: 1080 × 1920
- Frame Rate: 30 FPS
- Format: MP4
- Video Quality: High
- Best Platforms: TikTok, Facebook Reels, Instagram Reels, YouTube Shorts
Pro Tips for Better AI Resin Table Videos
- Choose premium wood textures for a luxury appearance.
- Maintain the same workshop style across every scene.
- Use consistent lighting to improve visual continuity.
- Select realistic epoxy resin colors such as crystal blue, emerald green, or clear resin.
- Generate multiple image variations and choose the highest-quality result.
- Keep every camera movement smooth and cinematic.
- Use high-resolution exports for the best viewing experience.
Common Mistakes to Avoid
- Changing the workshop environment between scenes.
- Using inconsistent wood textures.
- Generating low-resolution images.
- Skipping image references when creating the next scene.
- Using overly dramatic transitions.
- Adding distracting background music.
Frequently Asked Questions
Can beginners create these AI resin table videos?
Yes. This workflow is suitable for beginners because the AI generates both the image prompts and animation prompts automatically after you complete the initial setup.
Which AI tool creates the prompts?
You can use either ChatGPT or Claude AI to generate the complete set of image prompts and video prompts based on your selected table design.
Which AI tool generates the images?
Google Flow or NanoBanana can be used to create realistic images for each stage of the epoxy resin table making process.
Can I upload these videos to multiple platforms?
Yes. Once your project is exported, you can publish it on YouTube Shorts, TikTok, Instagram Reels, and Facebook Reels.
Final Thoughts
AI makes it easier than ever to create professional epoxy resin table making videos without filming an actual workshop. By combining AI-generated prompts, realistic images, smooth image-to-video animation, and clean editing, you can produce visually satisfying content that performs well on short-form video platforms.
Experiment with different wood species, resin colors, decorative materials, and luxury interior settings to keep
Find master prompt here: EPOXY RESIN TABLE MAKING VIDEOS