How to Create Viral 3D Human Body Health Videos with AI (Complete Guide)
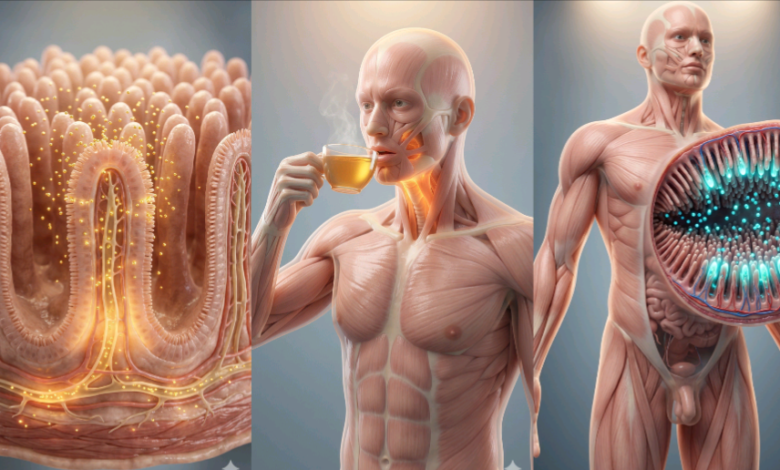
How to Create Viral 3D Human Body Health Videos with AI (Step-by-Step Guide)
AI-generated educational health videos are becoming one of the fastest-growing content categories on Facebook Reels, TikTok, Instagram Reels, and YouTube Shorts. By combining realistic 3D anatomy visuals, AI-generated narration, and cinematic animations, creators can produce highly engaging videos that educate viewers while attracting millions of views.
In this guide, you’ll learn a complete workflow for creating professional 3D human body health videos using popular AI tools. From generating a health topic and narration script to creating realistic visuals, adding voice-over, and editing the final video, this tutorial covers everything you need to get started.
Tools You’ll Need
- Claude AI (Script & Prompt Generation)
- Google Flow (Image Generation)
- Google Flow Image-to-Video
- ElevenLabs (AI Voice Over)
- CapCut (Video Editing)
Step 1 – Generate Your Health Topic and Prompts
Start by opening Claude AI and pasting your master prompt into a new conversation. The AI will instantly generate ten unique health-related video topics covering anatomy, diseases, body functions, nutrition, and medical education.



Review the list carefully and select the topic that best fits the type of content you want to create. Simply reply with the topic number, and Claude AI will generate a concise narration script designed for short-form educational videos.
After receiving the script, reply with GO. Claude will automatically create all the image prompts and matching video prompts needed for your project.
At the end of this step, you’ll have:
- A complete narration script
- Eight detailed AI image prompts
- Eight matching animation prompts
These assets form the foundation of your entire production workflow.
Step 2 – Generate High-Quality AI Images
Next, open Google Flow and switch to image generation mode.
Copy the first image prompt generated by Claude AI and paste it into Google Flow. Generate several variations and select the image with the best anatomical accuracy, lighting, and overall quality.
Download the selected image before moving on to the next prompt.
Repeat the same process for every scene until all eight images have been generated and saved in the correct order.
For better organization, rename your files sequentially such as:
- scene01.jpg
- scene02.jpg
- scene03.jpg
- scene04.jpg
- scene05.jpg
- scene06.jpg
- scene07.jpg
- scene08.jpg
Keeping the images organized will make the video production process much faster during the editing stage.
Step 3 – Animate the Images into Videos
Once all your images are ready, return to Google Flow and switch to the Image-to-Video feature.
Upload the first image and paste the corresponding animation prompt generated by Claude AI. Google Flow will transform the static image into a realistic animated clip with smooth movement and cinematic camera motion.
Repeat the same workflow for every remaining image until all scenes have been converted into short video clips.
After downloading every clip, keep them arranged in the same numerical order to simplify the editing process.
Step 4 – Create a Professional AI Voice Over
After generating your narration script, open ElevenLabs and create a new voice-over project.
Copy the complete narration script from Claude AI and paste it into the text box. Choose a clear, natural-sounding voice that matches the educational style of your video. A warm, calm voice usually performs best for health-related content because it is easier for viewers to follow.
For better pacing, slightly reduce the speaking speed so viewers have enough time to understand both the narration and the visual animations. Once you’re satisfied with the preview, generate the voice-over and download the audio file.
Step 5 – Edit Everything in CapCut
Now it’s time to assemble your project into a polished short-form video.
Open CapCut and create a new project using a 9:16 vertical canvas with a resolution of 1080 × 1920 pixels. Import all eight video clips in the correct order and place them on the timeline.
Add your AI-generated voice-over beneath the video track, then adjust each scene so it matches the narration naturally. Use simple transitions such as Fade or Cross Dissolve to keep the presentation smooth without distracting the viewer.
You can also enhance the viewing experience by adding subtle medical-style sound effects and low-volume ambient background music. Keep the voice clear and easy to hear throughout the entire video.
Recommended Export Settings
- Aspect Ratio: 9:16 Vertical
- Resolution: 1080 × 1920
- Frame Rate: 30 FPS
- Format: MP4
- Video Length: Around 60–80 Seconds
- Video Quality: High
These settings are ideal for TikTok, Facebook Reels, Instagram Reels, and YouTube Shorts.
Tips for Creating Better AI Health Videos
- Choose health topics people search for regularly.
- Keep explanations short and easy to understand.
- Use realistic anatomical visuals.
- Maintain consistent lighting and visual quality across every scene.
- Use clear narration without rushing.
- Include an attention-grabbing hook within the first three seconds.
- End your video with a helpful takeaway or interesting fact.
Common Mistakes to Avoid
- Using low-quality or unrealistic anatomy images.
- Speaking too quickly during narration.
- Adding distracting music that overpowers the voice.
- Using inconsistent image styles between scenes.
- Uploading videos with low resolution.
- Skipping transitions that make scenes feel disconnected.
Frequently Asked Questions
Can beginners create these AI health videos?
Yes. This workflow is beginner-friendly and only requires a few AI tools to produce professional-looking educational videos.
Which AI tool creates the narration?
Claude AI generates the narration script, while ElevenLabs converts it into a realistic voice-over.
Can I publish these videos on multiple platforms?
Absolutely. After exporting your finished project, you can upload it to TikTok, YouTube Shorts, Facebook Reels, and Instagram Reels.
How long should each video be?
Videos between 60 and 80 seconds usually work well for educational short-form content because they are long enough to explain a topic while keeping viewers engaged.
Final Thoughts
Creating professional AI-generated health videos is easier than ever when you combine the right tools and an organized workflow. By generating educational scripts, realistic anatomy visuals, AI voice-overs, and cinematic animations, you can produce engaging short-form videos that attract viewers across multiple social media platforms.
Continue experimenting with new health topics, improve your visual quality over time, and stay consistent with publishing. The more valuable and informative your videos are, the better your chances of building an engaged audience.
Follow this workflow for every project and you’ll be able to create high-quality AI health videos quickly and efficiently.
Download prompt here 3D HEALTH VIDEOS PROMPT